Sunday 17 February 2013

SWIRLYDOO'S ULTIMATE DESIGN CHALLENGE WEEK 5


SWIRLYDOO'S ULTIMATE DESIGN CHALLENGE WEEK 5

Create "ART JOURNAL PAGES" using scrap pieces of paper. Simply follow Heidi's instructions on her video to get an idea of what we're looking for. We want to see what you can do when you don't have much to work with! Specifically we want to see the Layering, Clustering, Doodling, Using a mask with crackle paint, or other molding/modeling mediums, Use Gesso or white acrylic paint for a place to add journaling, or some other design element


Well what a week - this has been an awesome challenge.  I am by nature a VERY organised person in every aspect of my life - even my books are in the bookcase alphabetically by author! To randomly create a journal is not something my brain comprehends however to have filed pages that i can practise and experiment techniques - now that makes sense!! - and this was created.....


Some individual shots:


 and some closer shots


Til next time - happy scrapping  :)


Saturday 9 February 2013

Swirlydoos Ultimate Design Challenge Week 4


Cant believe I have made it through to week 4.  This week was all about canvas, stencil or masking, misting and/or painting.  I did a canvas of my wedding.  I have been meaning to do something with my wedding photos but never found the right thing or time. 10 years later I have created this canvas.

I started with misting colours – I used smooch spritz frosted grape, ice rink, gingerale and a mist that I had previously made but no idea what was in it!  Whilst still damp I blotted with a paper towel and sprayed some more.  Whilst damp I then applied my first stencil with gesso – the hearts.  In hindsight I probably should have used some thicker paste.   I used gesso to attach a paper doilee at the side.  I then really wanted to use the bead gel but I didn’t have any so I mixed some beads with Liquitex Gloss Gel and made my own.  I then set this aside to dry overnight. 

 I then set about making my embellishments.  I used some blossoms cake decorating flowers which I coloured with distress ink – dusty concor.  I also coloured some Green Tara flowers with milled lavender and dusty concord distress markers and sprayed perfect pearls on.  The swirly bits are from Samantha Walker die cut – Ornate Artisan Tags and Accents which I coloured with Shabby Shutters, Peeled Paint and Dusty Concord distress inks then embossed with sparkling embossing powder.  I did this also to the tag. The ribbon was also soaked in distress stain and dried.  The pins in the ribbon I made myself using beads and Floral greening pins cut in half.  The brown wire behind the flowers, which is difficult to see, is also from the florist department – cloth covered wire. 
 With my canvas dry I added some more paint – I painted the rises on the stencil with smooch paint – snickerdoodle and the edges of the canvas with Viva Precious Metal Colour Gold and Mother of Pearl.  I also applied these paints randomly on the canvas.  I also added a little more green misting.  The bling is from Prima – say it in crystals.  I put it altogether with a hot glue gun and I don’t want bits falling off over time when it is hanging on the wall.  I have added some close up photos for you 


Sunday 3 February 2013

Swirlydoos Ultimate Design Challenge Week 3

This weeks challenge was:

"Create a tag, embellishment, layout, card or altered project using the metal foil technique.

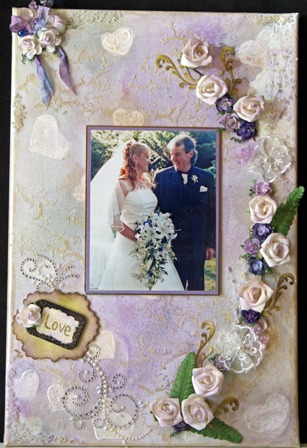
 I began this week creating a layout of my son - this was nearly completed when I had a creative moment and decided to do an Off the Page project.  This is not my general style but I had a ball doing it and think i will do alot more altered projects!

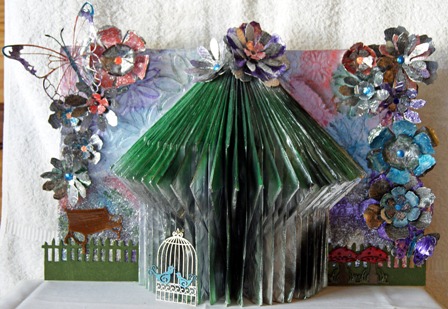
I start off with a hardcover book and folded the pages to get the image of a tree:


I then used the Daisy Cluster stencil from The Crafters Workshop and gesso on the inside covers.  Once dried I covered the top half with flat aluminium foil. The bottom half, i scrunched the foil and rolled it out with a rolling pin and stuck that down.  I used Claudine Hellmuth Multi Medium Matte - i find this product so easy to work with.  Using my embossing tool i highlighted the gesso underneath.  I folded individual pieces of foil to cover each page


As i do not have alcohol inks - and cant seem to buy them in Tasmania - and i am not lucky enough to own Copic Pens, I used enamel spray paint from my DH shed in green and black on the tree.  i sprayed the covers with black and wipes of most, just leaving a tinge -  had to be fast though cos it dries really quickly and once on, impossible to get off!  I then used Viva Precious Metal Colours to the covers to highlight the flowers and indentations on the foil.  The fence was cut from the tim holtz diecut, the bench and mushrooms are chipboard painted and glossy accents applied on top.

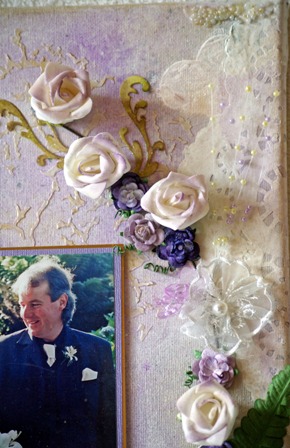
The flowers were all cut from either grunge board with ranger foil tape sheets, aluminium foil glue to cardstock or insulation tape stuck to cardstock.  Some were embossed and some were scrunched and rolled out before glueing to the card stock.  All flowers were cut from the Tim Holtz Tattered Flowers die cut and put together with scrapdots 3 dimensional. The large butterly was also foil on cardstock and die cut from memorybox butterfly die cut.


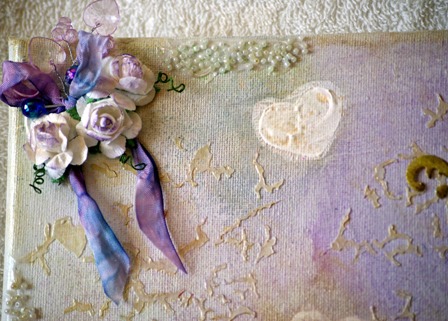
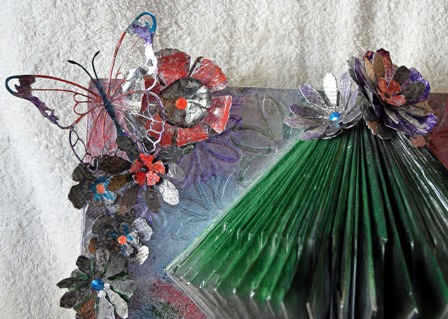
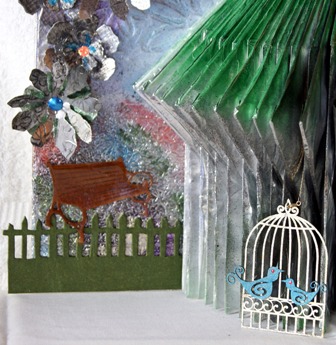
I have attached some close ups:


If you want to see more awesome projects submitted in this challenge head to the swirlydoo website: http://www.swirlydoos.com/gallery/